A Quick Guide to Interactive Prototyping
As digital product complexity increases, so does the need for interactive prototyping. To minimize UX debt and reduce usability issues, designers must test and iterate with the highest accuracy during the design process.
Get the world’s most advanced end-to-end design tool. Create fully functioning interactive prototypes that look and feel like the final product. Sign up for a free trial to explore UXPin’s advanced prototyping features.

What are Interactive Prototypes?

Interactive prototypes respond to user engagement like clicks/taps, swipes, scrolls, etc., accurately replicating the final product experience. These prototypes include navigation, transitions, animations, popups, and other interaction design characteristics.
What is the difference between an interactive and a non-interactive prototype?
The short answer is interactive prototypes have interactivity triggered by user engagement or system changes, while non-interactive prototypes don’t.
Product teams often call prototypes built using image-based design tools non-interactive, even though they have some basic functionality. Image-based design tools are excellent for designing wireframes and mockups, but they lack features to add interactivity–most don’t even offer functioning input fields.
Designers can only build truly interactive prototypes using a design tool like UXPin or collaborating with UX engineers to develop a code prototype (HTML, CSS, & Javascript)–the latter being the more expensive and time-consuming option.
High vs. low fidelity interactive prototypes
Designers can create both high and low-fidelity interactive prototypes. Low-fidelity interactive prototypes are usually wireframes with basic interactivity, while the high-fidelity version looks and feels like the final product. Check out an extensive comparison of low-fidelity and high-fidelity here.
Designers use low-fidelity prototypes early in the user experience design process because they’re easy to build and allow faster iterations. This speed enables designers to test many ideas quickly without wasting too many resources. Because these wireframes are interactive, designers can increase the prototyping scope during the early stages.
High-fidelity interactive prototypes are fully functional, offering a comparable, immersive user experience indistinguishable from the final product. These high-fidelity prototypes allow designers to identify usability issues and business opportunities. Insights they wouldn’t get using traditional image-based design tools (non-interactive prototypes).
Benefits of Interactive Prototyping
Accurate usability testing
The closer designers get prototypes to the final product, the more accurate their testing results. One of the challenges with image-based design tools is that designers can’t test UI elements like forms, date pickers, filters, dropdown navigation, accordions, and other “complex” components, without using multiple frames, plugins, and other workarounds.
The problem with these workarounds is that they’re time-consuming to create and don’t provide an authentic user experience. Designers may think they have solved an issue within the design tool’s constraints which doesn’t translate to the final product.
Interactive prototypes increase prototyping scope, so designers get accurate results from usability testing. They can pinpoint usability issues and iterate on solutions.
Meaningful stakeholder feedback
To get feedback and approval, UX designers must present stakeholders with wireframes, mockups, and prototypes throughout the design process. Poor quality prototypes result in stakeholders fixating on what the UI design doesn’t do rather than visualizing the bigger picture.
Designers can present ideas that accurately replicate the final product with interactive prototypes. Instead of “imagining” what a prototype does, stakeholders can engage with user interfaces, components, etc., to get a true sense of what the final product will do.
“There’s a lot more confidence from everyone (including designers, C-suite, directors, and developers) about what the final product will look like, the user experience, and interactivity—giving us higher quality feedback from stakeholders.” Erica Rider, UX Lead EPX @ PayPal, discusses interactive prototyping with UXPin Merge.
Visualizing information architecture and navigation paths
Understanding how users navigate digital products and the different paths is crucial for designing information architecture that meets user needs. Image-based prototyping tools allow basic navigational functionality but lack features for dynamic outcomes, testing search fields, and filters.
Designers must create multiple frames to achieve comparable final product functionality in image-based design tools or rely on UX engineers to build coded prototypes, requiring significant time and resources!
With interactive prototypes, designers can test search fields, filters, and other navigational elements to organize and optimize information architecture to align with user behavior.
Smoother design handoffs with less documentation
Design handoffs are challenging for product development teams. The friction between designers and engineers is usually down to prototype quality or not meeting technical constraints.
Interactive prototypes eliminate ambiguity while conforming to technical constraints with code-like interactivity, providing engineers with an accurate reference for programming.
With a clearer picture of the final product, engineers need less explanation, documentation, or back-and-forth communication for development.
Design handoffs are seamless if the product design team uses a tool like UXPin Merge for bringing interactive components to UXPin. Engineers install the design system’s package and pull the components they need to replicate the prototype. Merge renders any component changes as JSX for developers to copy and paste.
Learn more about Merge and how to request access.
How to Build Interactive Prototypes in UXPin
Our sign-up form example provides an excellent demonstration of what’s possible with interactive prototyping in UXPin. You can download the sign-up form example and import it to a new project to follow along.
This article provides the steps for creating a new project and importing .uxp (UXPin) files.
Build a mockup
We’re using a template for this example, but you can build mockups from scratch in UXPin.
UXPin works like any other design tool when it comes to designing mockups. Designers can choose from a selection of shapes, freehand tools, text, and boxes. UXPin also provides several function form fields and icons, enabling designers to create high-fidelity mockups much faster.
Check out our documentation for more details about the UXPin Interface and how to design UIs.
Add interactions
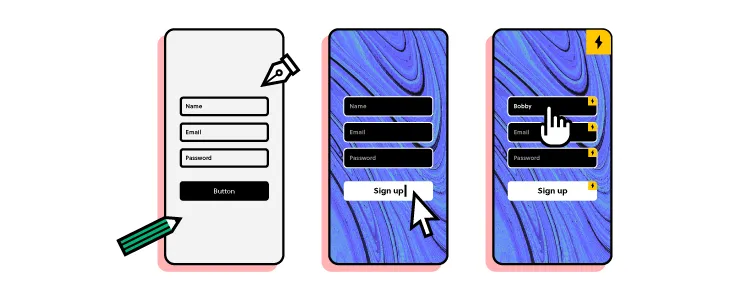
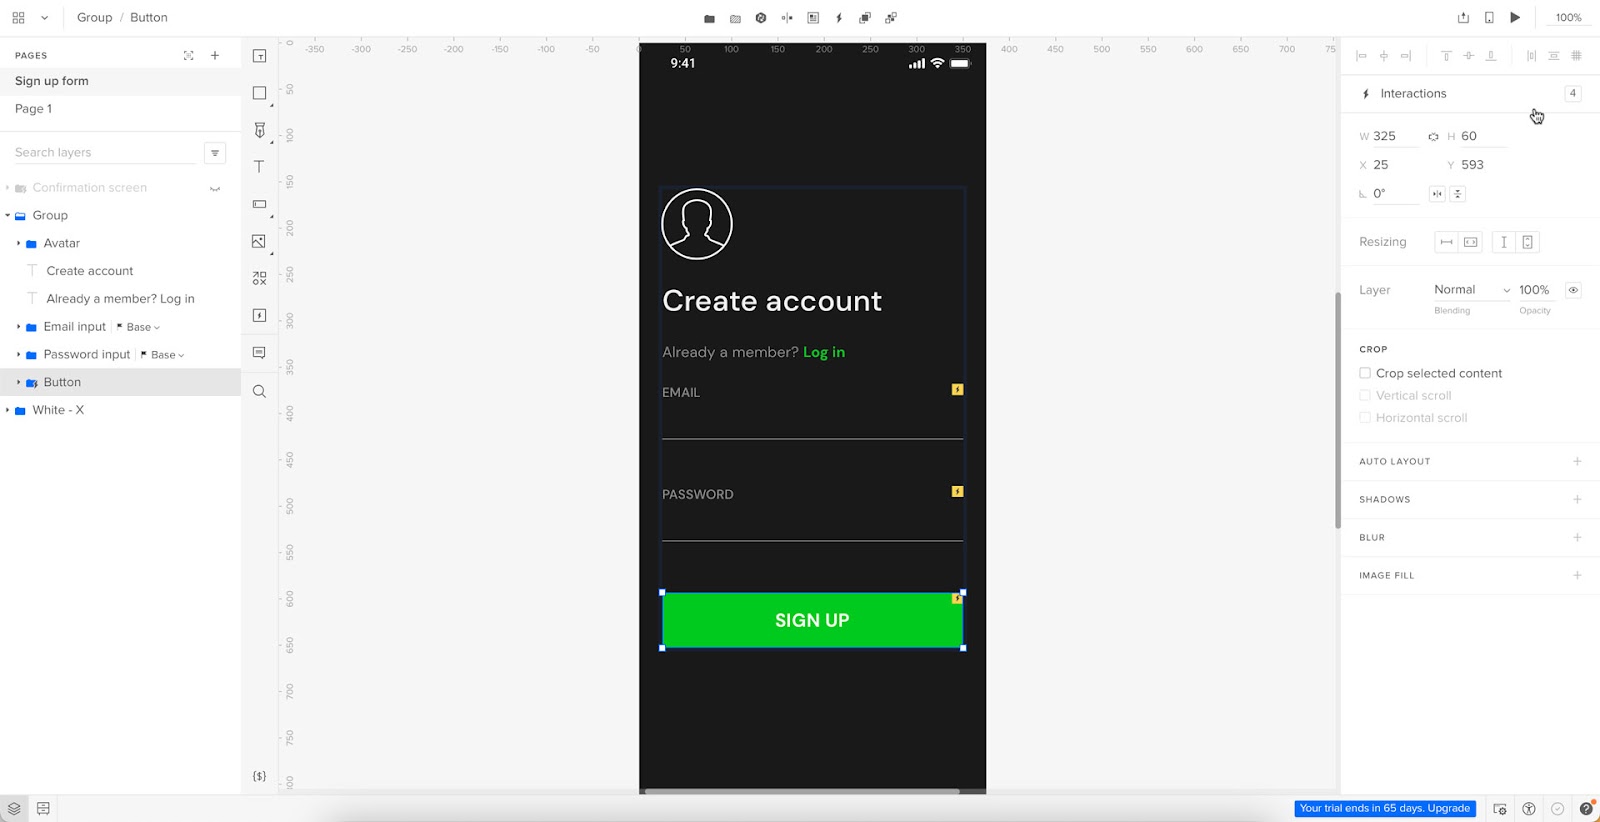
You’ll notice some of the elements in the sign-up form example, have a little yellow and black lightning icon, like the one pictured below.
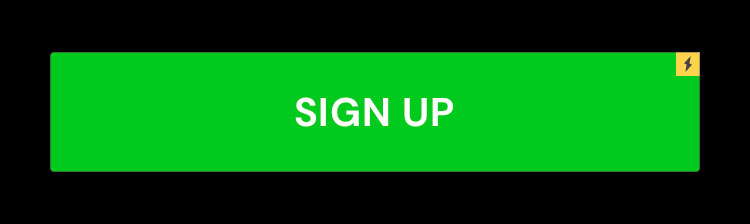
This icon tells us the component has interactions set up, which you can view by clicking Interactions in the Properties Panel.
Compared to elements with no interactions like this one.

Select the element you want to make interactive and click Interactions at the top of the Properties Panel and New interaction (in this example, we’re adding interactions to the SIGN UP button).
UXPin Interactions have four properties:
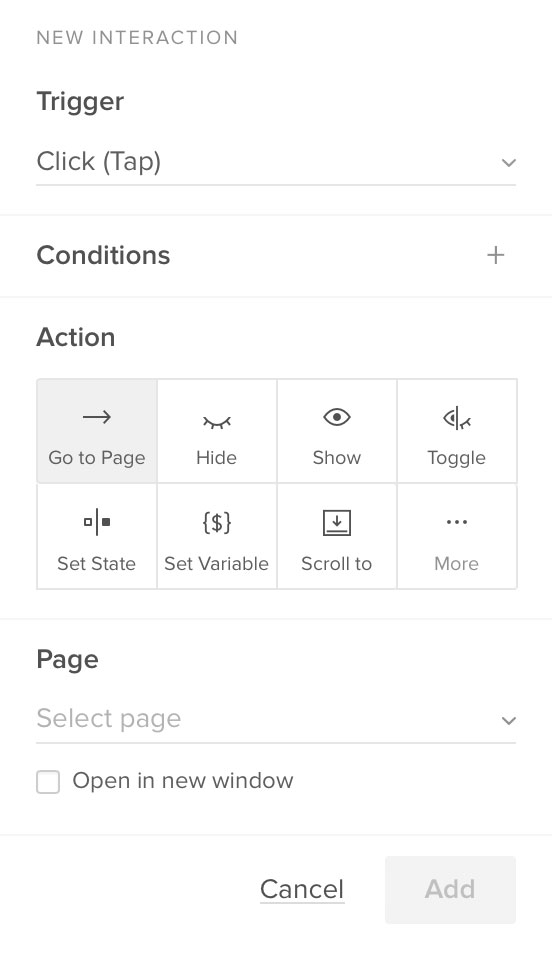
- Trigger: a user action that starts the interaction–click/tap, swipe, scroll, etc. UXPin offers 20+ triggers for mobile and desktop.
- Conditions: allow designers to make rules before the prototype performs an action or design dynamic user flows.
- Action: what happens after the trigger (assuming this meets any conditions). Actions can be as simple as a page transition or more complex, like an API call or playing a video.
- Select: below actions is a select property that changes depending on the action. For example, the selector will include a dropdown with available pages if you choose Go to Page.
- Animation: lastly, you can add animation. UXPin provides many CSS animations with easing, duration, and delay to breathe life into your prototypes.
Our sign-up form button has four interactions:
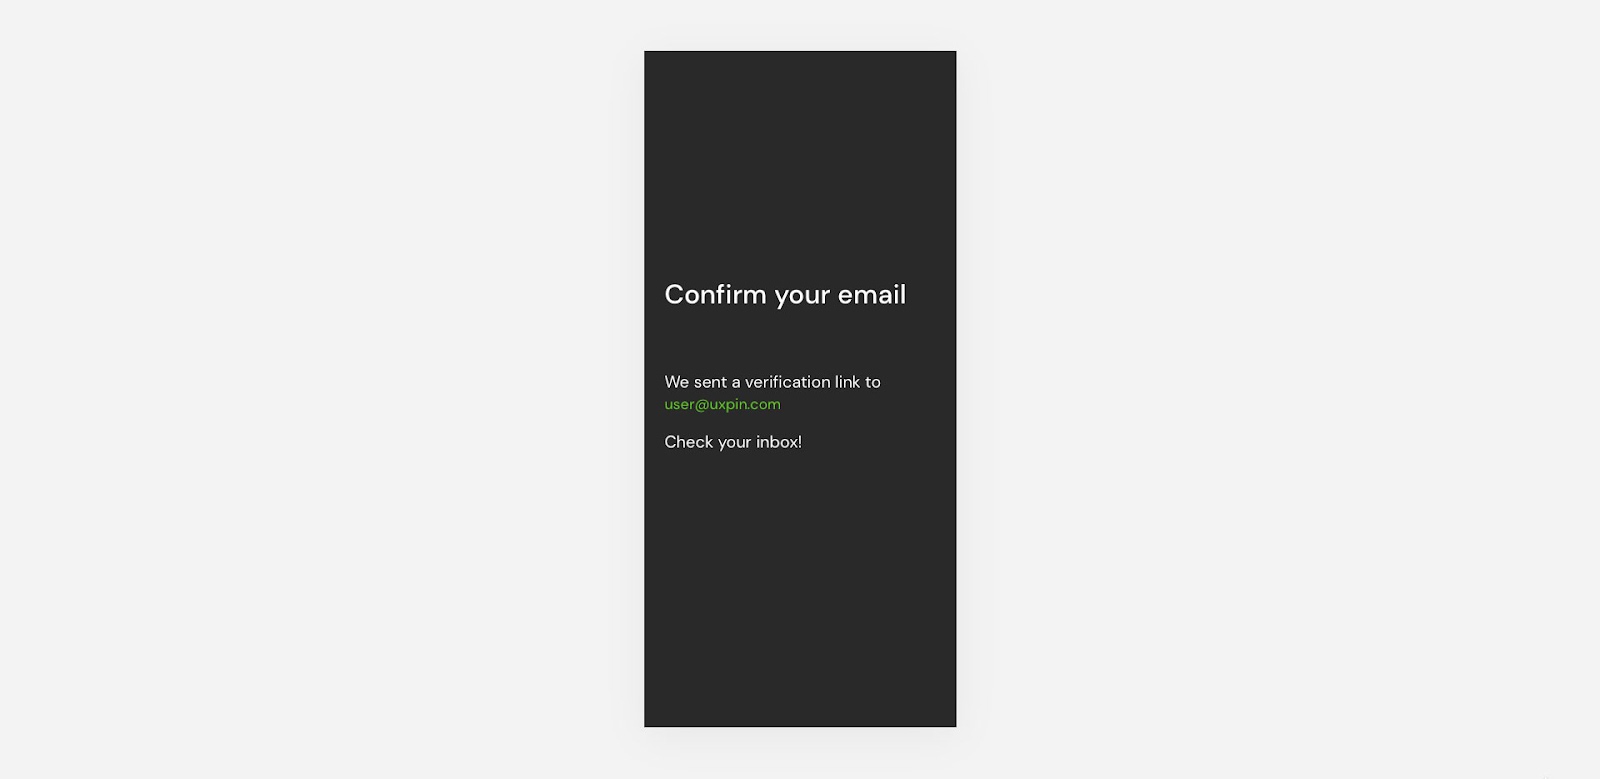
- Show confirmation screen: if the user completes the email and password fields correctly, the prototype will open the confirmation page. We’ve used a regex expression to ensure the email field includes an @ and domain extension, and the password must be longer than eight characters. The following error messages appear if the user doesn’t meet these conditions.
- Email error: if the user doesn’t complete the required email field, an error message appears below the input “Can’t be blank.”
- Password error: performs the same error message as email above.
- Set content of Email: creates a Variable for designers to use elsewhere in the prototype. In this example, we use the email variable to tell the user we have sent a verification link to their email address (see below).
UXPin’s Interactions allow designers to create dynamic prototypes that respond to user engagement comparable to code. To achieve similar results in an image-based tool, designers must create multiple frames, predicting potential user actions and outcomes, thus biasing the test’s results. Image-based tools don’t have functioning inputs, limiting the testing scope.
Interactive Prototype Examples
Here are some more interactive prototype examples created in UXPin.
Share Text Between Screens
UXPin’s Variables enable designers to personalize a user experience and pass data between screens, as we saw with the sign-up form’s confirmation screen above. Designers can share a single input, like the user’s name, or populate an entire profile with the user’s full name, address, contact number, and billing information used for eCommerce checkouts.
Follow the Share Text Between Screens to learn more about UXPin Variables.
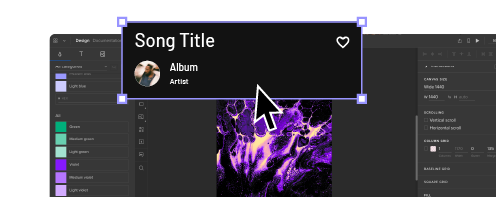
Scrollable Content
Vertical and horizontal scrolling is a significant facet of the mobile user experience. UXPin lets designers set up scrolling in a few clicks, creating a smooth, intuitive mobile app interface.
Follow the Scrollable Content tutorial to learn more.
Stepper
Steppers are essential eCommerce patterns. They allow users to add multiple pieces of the same item to their cart. Designers can use stepper functionality for volume control, light dimmers, and other incrementally controlled features.
Follow the Stepper tutorial to learn more.
Get started with interactive prototyping in UXPin
Design user experiences your customers love with the world’s most advanced design tool. Sign up for a free trial to discover UXPin’s interactive prototyping features.